GPS Truck Routing
Tours in Truck GPS Navigation
In logistics, there is usually not just one destination. 10–20 or even 50 stops in express logistics are more the rule. Of course, the driver should not enter one destination after the other manually into his truck GPS navigation, but it should work automatically. This article gives an overview of different possibilities to enter stop lists, i.e. tours, into the truck GPS navigation and to drive them off.
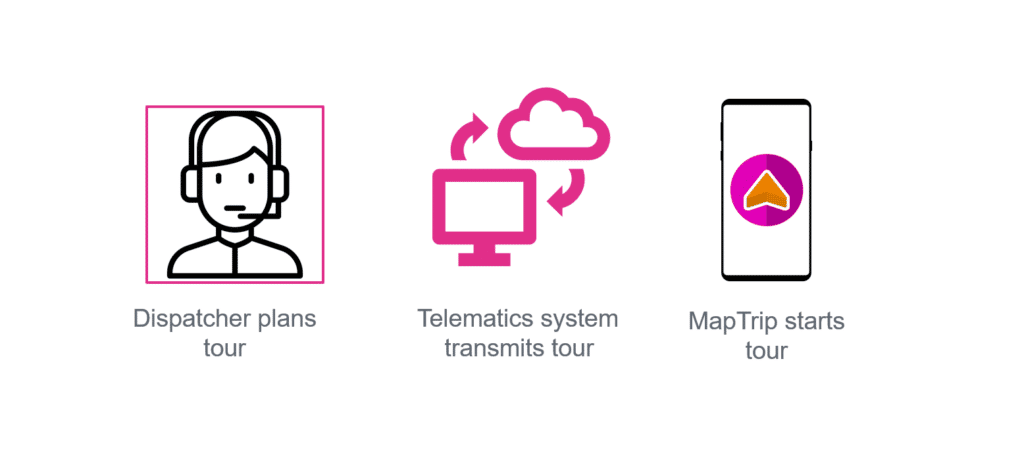
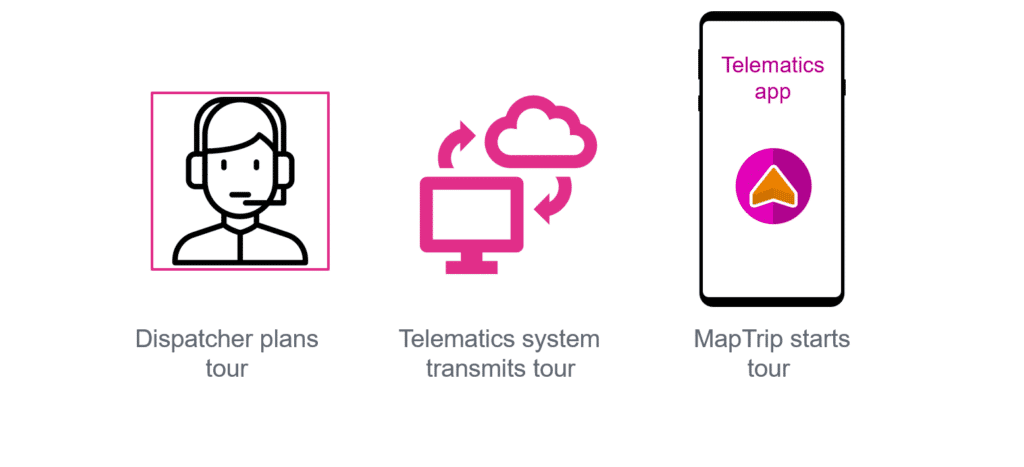
In a professional environment, truck GPS navigation, dispatcher and telematics system have to work closely together. In one day, a vehicle usually has to drive to not just one destination but a whole list of destinations. Of course, you want to avoid the driver himself having to enter one destination after the other. Instead, a tour is planned that contains the day’s destinations and calculates the respective driving times between the destinations.
Truck GPS navigation is usually just one component in the route planning or telematics system. A dispatcher plans the daily tour. For this, routes, ETAs and driving times have to be calculated. A resulting stop list is sent to the truck via the telematics system. The driver should then be guided to the respective destination by his GPS navigation.
On the part of the truck GPS navigation, this process can be accomplished with various methods.
Method 1: Save tour as a file in the GPS navigation device
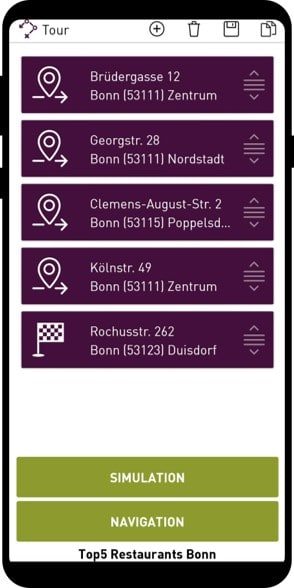
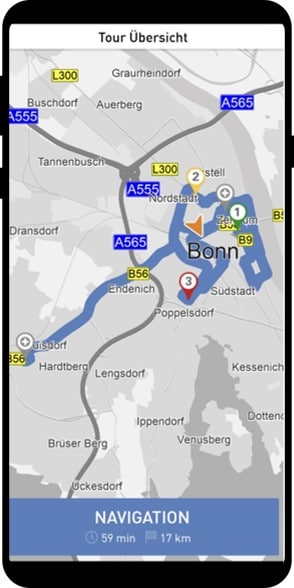
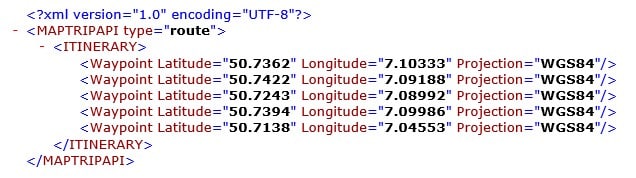
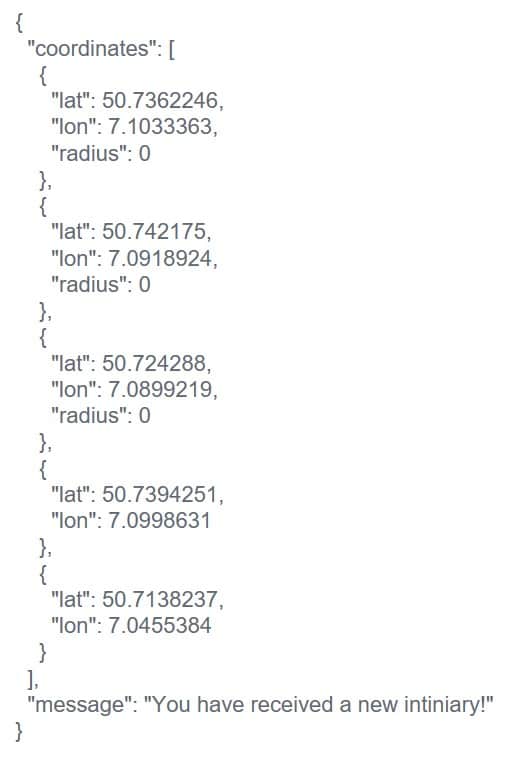
To start the tours in the MapTrip app, they must be saved as a file on the GPS navigation device. A tour to the (according to Tripadvisor) five best restaurants in Bonn looks like this, for example:
This file must be saved on the navigation device and can then be opened by the truck driver in the app. Saving the file on the device must be done e.g. by a telematics system.
The tour is not started automatically, but must be selected and opened manually by the driver.
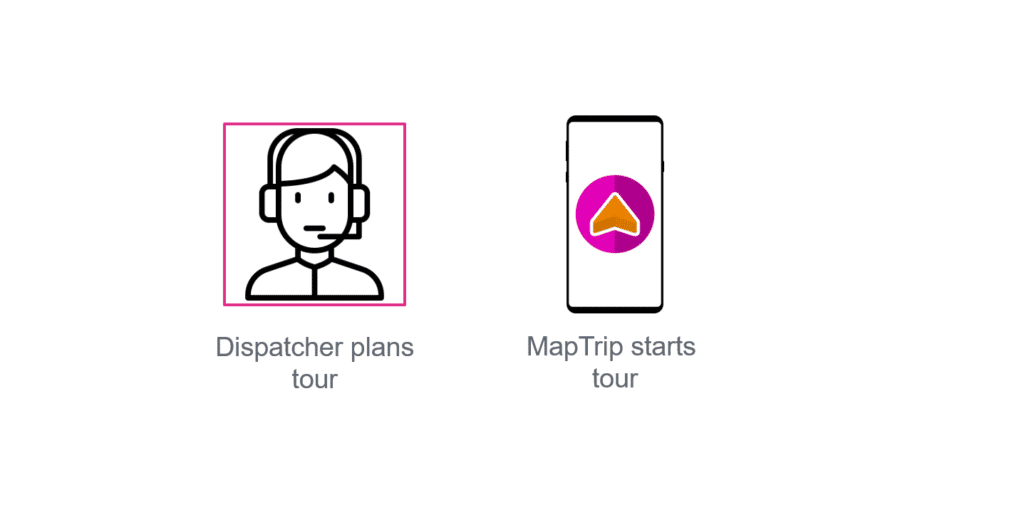
Method 2: The tour is transferred from the telematics application to the truck navigation via interface
This is the most common way how a tour is handed over to a truck navigation and started. In this method, a telematics application is installed on the navigation device together with the navigation. Both apps can communicate with each other via an interface.
In this case, the telematics app would transfer all destinations of the tour to the truck GPS navigation one after the other. As soon as the tour is complete, the destination guidance can be started by the telematics app.

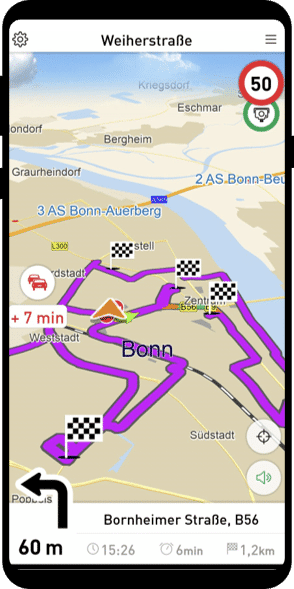
Then the destination guidance is started with startTour(). This can be done without any intervention by the driver. The entire process can therefore be controlled completely automatically. Callbacks inform the controlling telematics application about the progress of the destination guidance. The destinationReached() callback, for example, informs the driver that the destination has been reached. The telematics application can then push the navigation into the background and display its own dialog.

If you want to learn more about how the MapTrip interface works, read the tutorial here or the documentation here.
Method 3: Beam the tour directly from the dispatcher to the truck GPS navigation via the web
For this purpose, the trip planning application in dispatching can use a special function of the server API. Using the sendItineraryToDevice function, you can easily send the list of destinations directly to a MapTrip navigation device via the web.
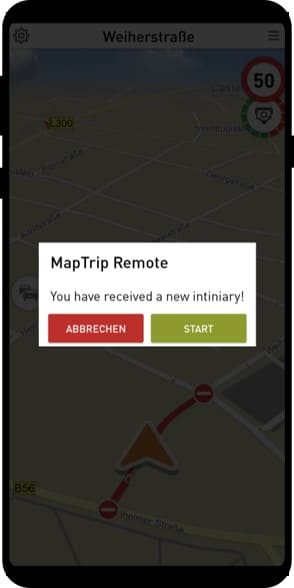
This does not require file transfer as in the first method, nor a telematics app as in the second method. The transfer of the tour is done directly by the server API and MapTrip GPS Navigation.
Would you like to try what is the best method for you?
If you want to try the methods described above, you can download MapTrip Truck Navigation for free here. You can test the MapTrip Server API here.